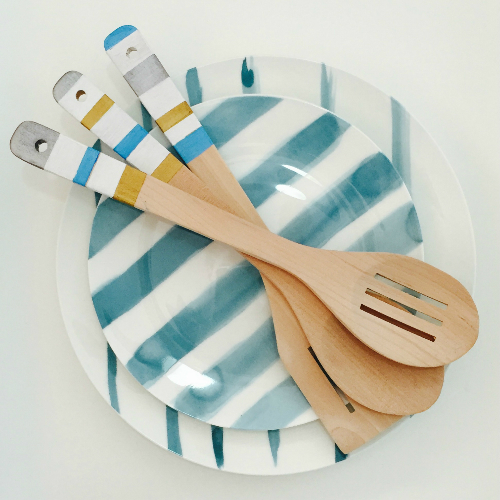
Utensils are staple pieces of equipment in any kitchen however; they don’t have to be plain and boring. Turn your kitchen staples into decorative pieces that will wow your guests at your next dinner party.
You can use any colour combination that you wish to mix and match with your kitchen décor.
Follow the instructions below and add your own style to a collection of plain wooden utensils.
Materials
Wooden utensils
Sandpaper
Non toxic paint
Masking tape
Non toxic shellac
Step 1
Sand the handle of the utensil that you wish to paint.
Step 2
Wash the handle to remove excess dust and allow to dry completely.
Step 3
Use masking tape to mark areas that you wish to paint and wrap it around the handle making sure that it is straight.
Step 4
Use non toxic paint to paint the areas that you wish and allow to dry. Apply a second coat if needed.
Step 5
Once dry apply a non toxic shellac to the painted area and allow to dry.
You can sit them in a beautiful utensil holder to display on your bench or bring them out at dinner parties to show off to your guests.
You will love the personal touch that these Mocka DIY painted wooden utensils add to your kitchen.